The days of a single device to do everything are largely finished, thanks in part to the prevalence of remote working (working from home) – separating devices for work/pleasure/hobby is not only recommended, but often prescribed by contracts etc. The last thing you want is to double up on infrastructure, and if it takes enough effort to plug out cables, human nature dictates that you won’t bother. Unfortunately, this will likely make you use devices for things they’re not intended, not optimised for, or worse…expressly forbidden (in the case of work devices).
Most tech enthusiasts will already have a personal work station – set up for how you want to use your computer. You’ll have a keyboard that you like (whether it’s mechanical, or membrane), a mouse with solid sensitivity (rather than the basic ones prevalent in industry), and monitor/s. I’m a big proponent of multiple monitors – they allow for greater efficiency as you know where to look for specific tasks, and improve multi-tasking with less clicking and dragging.
Enter the KVM
A KVM (Keyboard Video Mouse) is a device that allows you to connect one set of peripherals to multiple machines. It is the ideal solution for running multiple machines at one work station. Unfortunately, once you go beyond two monitors, and especially beyond two devices, the cost climbs significantly. In fact, I would consider the cost to far outweigh the few minutes saved every day, leaving them by the way-side. But as I already mentioned, human nature kicks in and you wind up not bothering to swap over cables (knowing you’ll have to do it again shortly/tomorrow). Perfectly good devices lie fallow, out of use, and age out into obscurity.
Analysing Requirements
Every set up is different, and your mileage will vary drastically depending on your devices, and how you want to use them. As such, it is important to start there – identify what you’re using, and how you want to use it. I will be using my setup as a sample to help illustrate:
- Macbook Pro (Personal)
- Windows Laptop (Personal)
- Windows Desktop (Work)
- 3x Monitors
- Printer
- USB Mic
- Graphics Tablet
- Keyboard & Mouse
- Surround Sound Speakers
- Storage Cluster
Not all peripherals are needed all the time for every device, however being able to utilise them when needed without effort is a big plus. In my experience, when presented with additional effort to use a machine for something quick, you forego the effort and use workarounds on your current machine. It’s not efficient, but you’re not wasting time fumbling with cables, so it seems faster.
Using what you have
Two out of the three monitors have three inputs; DisplayPort, HDMI, and VGA. My windows laptop and work desktop both have 1x HDMI and 1x VGA port, so this allowed for connection to two monitors simultaneously. My Macbook Pro has Thunderbolt 2, so can utilise the two unused DisplayPort connections. With no further investment, we currently have three computers connected to two monitors, and can quickly toggle between the sources from a button press.
The Problem
We still haven’t solved the peripherals, and we still have one monitor not being utilised. Unfortunately the third monitor only has two connections, requiring another solution to enable simultaneous connection. As it stands, there is considerable effort in plugging in/out cables. Thankfully the solution does not involve reinventing the wheel – industry solved this long ago: USB Docking Station.
Solution (Part 1)
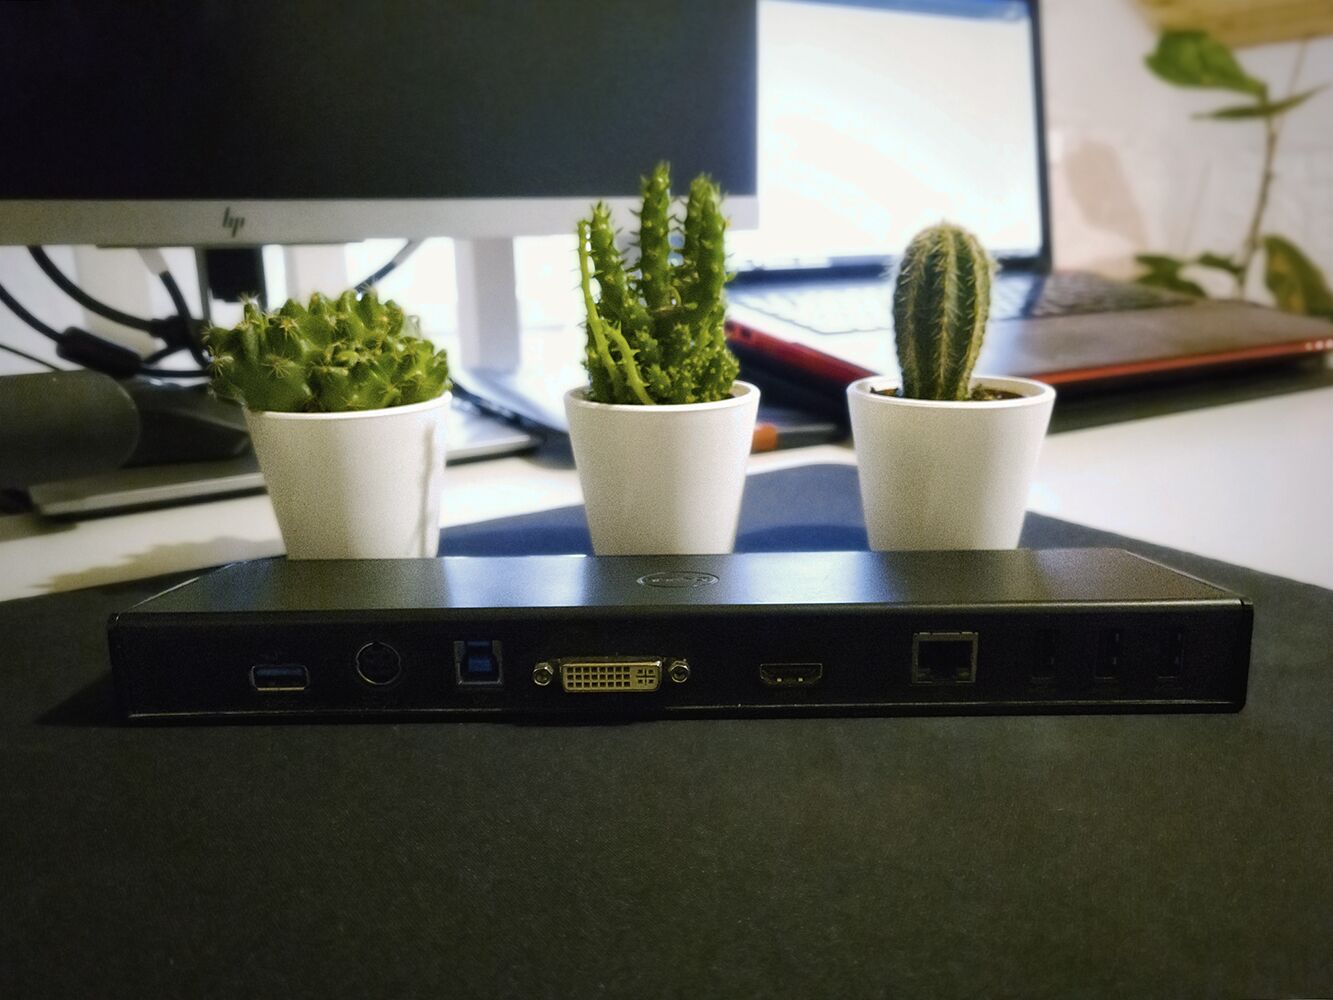
Picking up a DisplayLink enabled USB 3.0 docking station allows these two problems to be solved in one stroke. Best of all, you can pick up decent docking stations for very little money. Due to their prevalence in offices, you should be able to find the likes of the Dell D3000/D6000 for €30-€50 used. Just be sure to pick up one with a power supply, as they can be difficult to source after-market.
Now we’re in a situation where we can connect our peripherals to the docking station (audio, keyboard, mouse, mic, graphics tablet etc.), as well as the third monitor, and we have a single cable to move between three computers. You can even connect an ethernet cable to the dock, cutting down on the number of cables keeping your setup sleeker, whilst not compromising on speed. It is not perfect – the third monitor uses DisplayLink, which can be glitchy – it is designed for convenience, and that is our end goal. The monitor relegated for DisplayLink is used for more basic tasks e.g. messaging, spreadsheets, documents etc. It does require DisplayLink drivers, which on Windows are typically auto-installed, however on Mac, you will need to install DisplayLink software to get up and running.
Removing the final Cable (Solution Part 2)
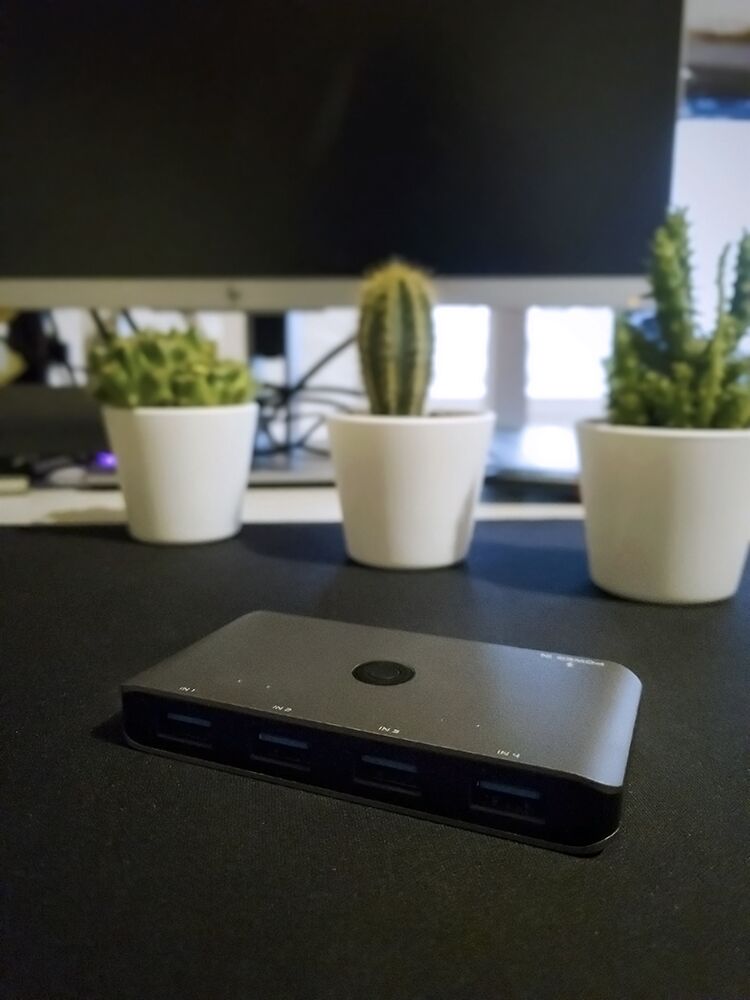
This last step is not strictly necessary, however if you want to get the most out of it, it is highly recommended. Bending down to plug in/out cables, and dealing with cable length to be able to reach all computers is just annoying. To help keep your setup clean, the optimal solution is to implement a simple USB switch. I went with a 4-way USB 3.0 switch (4-in 4-out), allowing for additional peripheral connections. The docking station connects to the switch, and the three computers connect to the other side. It leaves room for one additional device (which although unlikely, is nicer to have and not need than need and not have), and for additional USB peripherals (if required).
A decent USB switch will cost circa €50 – if you need less ports, the cost will come down. Be careful trying to shave off money on this – cheaper switches are typically USB 2.0, which is fine for peripherals only, but once you’re bringing in the additional bandwidth of ethernet, audio and video, you will want to spend the extra.
The Good
- No cables to move between computers
- Single push-button to switch input device
- Sleeker setup
The Bad
- Power delivery
- 1x single USB 3.0 port is driving everything; USB Switch, Docking Station, Monitor, Keyboard, Mouse, Mic, Audio, etc.
- 3x Additional cables (USB A to USB A) to route/hide
- Reliance on DisplayLink for third monitor
- Your mileage may vary with DisplayLink – I have found it fine for 99% of uses, but it will not suit everyone. Especially higher grade monitors
End Result

We now have three distinct machines connected to a single workstation setup, optimised for you personally. Regardless of the work you’re doing, you have the equipment you want to be using. By using the external storage cluster, we can quickly switch tasks between the machines and use each of them for what they’re good at. A basic example is taking footage & photos from an Android phone, ingesting via Windows machine (Mac has gotten better over the years for dealing with Android, but it’s still quirky to say the least), editing the advertising campaign on the work machine, and switching to Mac to utilise FCPX for a quick edit. While that’s rendering, you can switch back to your other machines, and keep working.
You maximise the use out of all your machines, and devices.
Switching between machines is relatively seamless – there are three buttons to press; USB switch, and the source control on the two primary monitors. It takes circa 5-10 seconds to switch. Sure, it’s a bit more effort than a dedicated KVM, but for €80 versus €600+…I can live with that!